Friday, November 8, 2013

Happy Birthday to my Hubby!


This card was created for my wonderful husband's birthday that was in October.  We share the same birthday month and like to go on a new & exciting road trips each year!  This year we journeyed to Foxburg, Pennsylvania and stayed at a hotel along the Allegheny River.  We visited a very yummy winery and found a wonderful scrapbook store along the way!

This card was inspired by our dream to live out in the country hopefully once my husband completes nursing school!


I finally got to play with my envelope board and made this beautiful envelope to match the card I made!!
 

I started with an 8 1/2 by 11 sheet of card stock in Early Espresso, cut it in half and folded to make the card.  I took pieces of patterned from our last holiday catalog and back them with either Marina Mist card stock or Cherry Cobbler.  I used a piece of Marina Mist card stock and die cut it with a circle, then ran in thru the Big Shot with the Woodgrain Embossing Folder.  I die cut a smaller circle with Whisper White card stock and stamped the tractor in the center.  I colored the tractor using my Stampin' Markers in Marina Mist, Cherry Cobbler, Garden Green, Basic Grey, Smoky Slate and Black.  The "Happy BIrthday" was inked in Cherry Cobbler and stamped onto a piece of Marina Mist card stock which was punched out by the Word Window Punch for the completed look!


Thank you for visiting with today!

Nicole♥
 

Sweet Baby!!


When I saw this card created by Yapha at Yapha's Stampin' Blog I knew it would be prefect to CAS for a baby card that I need to make for one of our Rad Tech's at work!
Since Rebecca does not know if she is having a boy or girl I wanted a color palette of pastel yellows and greens.

I started with an 8 1/2 by 11 sheet of card stock in So Saffron, cut it in half and folded to make the card.  Next, I attached a panel of Soft Suede card stock to frame around the main design.  I used the Sunburst Technique with So Saffron designer paper and then attached a small panel of Pistachio Pudding designer paper on the bottom.  I wrapped around a piece of 3/8" Ruffled Stretch Trim in Pistachio Pudding as a divider between the top and bottom design.  I then die cut a scallop circle from Pistachio Pudding card stock and sponged around the edges with Soft Suede ink.  I die cut a smaller circle from Whisper White card stock, sponged around the edges in So Saffron, and stamped the baby elephant in So Saffron ink.  I inked the "sweet baby" banner in So Saffron and die cut to attach for the completed look!

Thank you for visiting with me today!

Nicole♥ 
Saturday, November 2, 2013

Dia de los Muertos


Feliz Dia de los Muertos!

I wanted to honor my loved ones that have passed on so I decided to make a card in celebration of the traditional Mexican holiday "Day of the Dead".  To me "Day of the Dead" is seeing skeletons with vibrant colored flowers. While I was reading about the celebration on Halloween night I learned what each of the colors used represents.

Black- represents death & is used mostly as a background color.
White- represents purity & renewal.
Purple- is a very important color.  It It signifies pain, suffering, grief and mourning. Purple is used by the families to acknowledge their loss of loved ones.
Pink-  represents people that are paying joyous tribute to the lives of the deceased. They celebrate the return of the dead and their reunion with family members.
Orange- represents the sun.
Yellow- represents the light and also death.
Red- represents blood or the blood of life

**(The information above I found on eHow)**


Thank you for visiting with me today!

Nicole♥


Friday, November 1, 2013

Gone Batty~ Septemeber Workshop


I forgot to post this one!  This was the card we made at our September workshop, Halloween themed of course!
I wanted to play with the Stampin' Up! Washi Tape & decided to make a diagonal pattern.  I sponged my circle with Tangerine Tango & Daffodil Delight ink to make my harvest moon for my crazy bat to hang upside down in!  I just had to add some googly eyes and a crazy drawn on mouth using a white gel pen!


Thank you for visiting with me today!

Nicole♥


Supplies Used:
Stamp Sets- "That's the Ticket"
Ink- Daffodil Delight, Tangerine Tango & Basic Black
Cardstock- Tangerine Tango, Basic Black & Whisper White
Owl Builder Punch
Bird Builder Punch
Ticket Duo Punch
Googly Eyes
White Gel Pen
Sponges
Circle Punch Die Cut
Witches' Brew Designer Washi Tape


Thursday, October 31, 2013

Happy Halloween!!


Happy Halloween Everyone!!

I hope everyone is having a spooky time trick or treating!  The poor little kids out here in Pennsylvania are getting soaked with all our rain this evening!

To start this card design I cut an 8 1/2 by 11 sheet of card stock in Pumpkin Pie & folded in half to make my card.  Next, I cut a piece of Basic Black card stock to frame my Witches' Brew Designer Series Paper and attached to my card.  The spooky tree with an owl stamp is from the Stampin' Up! set "House of Haunts" (retired), however, you can purchase this particular stamp in the "Best of Halloween".  I stamped the image in black on Whisper White card stock then sponged Pumpkin Pie & Daffodil Delight ink on the image.  I used the Stampin' Up! die cuts called Label Framelits to cut out my image with my Big Shot.  The first die I used was the #2 die (counting from the inside) for my image, the #3 die for the layered Basic Black card stock & the #4 die for the layered Pumpkin Pie card stock.  I took my piercing tool and pierced around the Basic Black die cut & the Pumpkin Pie die cut.  I added some ribbon around my die cuts and finished with a knot.  
I used the "Trick or Treat" saying from the new Stampin' Up! set called "Bite Me".  I stamped the saying in Pumpkin Pie onto Very Vanilla card stock, added a Pumpkin Pie piece behind to frame & then attached a Basic Black banner for the completed look!

Thank you for visiting with me today! 

Nicole♥


Monday, October 14, 2013

Blog Candy Winner Announced


Congrats to Vicki #31 for her lovely comment on my "World Card Making Day" post!  She is the lucky winner of this fantastic stamp set from Stampin' Up! called "Four You"!

Vicki's comment:
Beautiful design!! Love the yellow and black colors! Thanks for sharing this for World Card Making Day! :) HUGS

Thank you to all who left comments on my post!  I hope you will come back for another visit soon!

Nicole♥


Saturday, October 5, 2013

Operation Write Home "World Card Making Day" Bloghop


Hello & Welcome! 
I am so excited to be part of Operation Write Home's bloghop for World Card Making Day!

My love & passion for my craft is a small way I can give back to the men & women who protect us from harm everyday & fight with extreme bravery for our freedom!  Join us today in supporting our troops through our craft at: operationwritehome.org 

Learn how you can give back to our men & women that sacrifice so much for all of us!


My card today is based on Operation Write Home's Sketch #109:


And here is my card:


 My card was created using the Stampin' Up! "Pleasant Poppies", "Gorgeous Grunge" & "For You" stamp sets.  I decided on Daffodil Delight, Basic Black, Smoky Slate & Whisper White for my color palette.  First, I embossed the poppies in Black embossing powder.  To color the poppies I used some Daffodil Delight ink with a blender pen, coloring all the flowers, then going over a few petals using the Daffodil Delight marker to make some of them a little darker.  The "paint speckled" look was done by one of the stamps in the "Gorgeous Grunge" set in Smoky Slate ink.  I added texture to the card by using the Stampin' Up! "Pretty Print" embossing folder & added a Vintage Faceted Designer Button with a rhinestone for the completed look!

Please leave a comment & win some "Blog Candy"!!  I will announce the winner on October 14th!!


 Thank you for visiting with me today!!  Enjoy hopping along!!

Nicole♥ 

 Click below to get back to the bloghop!!
http://operationwritehome.org/starsandstamps 

Thursday, September 26, 2013

Happy Birthday to my Dad!


Happy birthday to my Dad!  His birthday was on the 18th & I wanted to wait a bit before posting this card I made for him.  I CASE'd the overall card again from fellow demonstrator Brandy Cox @ brandyscards.com.  When I first saw this stamp set & hair gel technique I thought it would be perfect for my Dad's birthday card!
I did make some changes to this card to make it extra special for my Dad!  I decided to use Calypso Coral ink to make the "Seaweed" stamp look more like coral.  I inked three fish in Midnight Muse that I fussy cut then popped up with dimensionals.  I used my 3/4" circle punch for the "Nantucket Oceanside Inn" stamp & backed it with a 1" circle in Early Espresso.

Thank you for visiting with me today!

Happy Stampin'!


Nicole♥


Supplies Used:

Stamp Sets- "By the Tide" & Happy Birthday (Saying) Unknown
Ink- Calypso Coral, Midnight Muse & Early Espresso
Cardstock- Midnight Muse, Early Espresso & Whisper White
Oval Collection Die Cuts
3/4" Circle Punch
1" Circle Punch
Medium Jewelry Baggie
Cheap Clear Hair Gel
Sticky Strip Tape
Dimensionals

Wednesday, September 25, 2013

Owl Thank You


I have been wanting to make something with our super cute Owl Builder Punch and decided to do so for my customer thank you's!  This design is a CASE from fellow demonstrator Tami White @ stampwithtami.com.  My card, however, is only 3x3 in size with a few other little changes.  I have seen so many clever ideas with this punch on Pinterest, go take a peek for yourself!

Thank you for visiting with me today!

Happy Stampin'!


Nicole♥


Supplies Used:

Stamp sets- "Woodgrain" & "Day of Gratitude" (Retired)
Ink- Early Espresso & Soft Sky (sponged inside card)
Cardstock- Early Espresso, Crumb Cake & Very Vanilla
Patterned Paper- "Halloween" (American Crafts)
Owl Builder Punch
1 3/4" Scallop Circle Punch
Circle/Scallop Circle Die Cuts (Spellbinders)
Sponge
Dk. Brown Sharpie

Tuesday, September 24, 2013

Happy 41st Anniversary to my Parents!


Wow!  My parents have been married for 41 years!  Congratulations to them!  They are the best parents ever & I am not saying that just because they are mine!

This card is a CASE from Nance Leedy on Pinterest.  I did change mine up a bit to make it extra special for my parents!  I stamped my typewriter in Basic Black Craft ink & then embossed with Black embossing powder.  I used the "Happy Anniversary" from the Teeny Tiny Wishes stamp set and embossed to match the typewriter.  After I die cut my circle I ran it thru my Big Shot with a Heart embossing folder.  I love this heart border punch, unfortunately it is now retired!  I do part with some of my Stampin' Up! items when they retire, however, the background stamp "By Definition" is a keeper!


Thank you for visiting with me today!

Happy Stampin'!


Nicole♥ 


Supplies Used:

Stamp Sets- "You're My Type" (Retired), "By Definition" (Retired) & "Teeny Tiny Wishes"
Ink- Basic Black (Craft Pad) & Real Red
Cardstock- Basic Black, Real Red & Whisper White
Patterned Paper- Neutrals Collection (Retired)- FYI~ there is a new one now!
Heart Border Punch (Retired)
Small Heart Punch
Red Glimmer Paper
Black Embossing Powder
Heart Embossing Folder (Cuttlebug)


Monday, September 23, 2013

My OWH Card Parade!


This is my Operation Write Home parade of cards!  All of these cards were sent in a box to the organization "Operation Write Home"!  I had a total of 120 cards for the troops to write home in and 10 Any Hero cards that will go to soldiers thanking them for their service!  I am looking forward to starting on my next box!


 "Miss You"- CASE from Pam Morris


"Thinking of you" -CASE from unknown (Sorry!)

"Fall Miss You"- CASE from Shauna Cundick 


Thank you for visiting with me today!

Happy Stampin'!


Nicole♥


Sunday, September 22, 2013

Any Hero Sunburst Card


Okay...so I am a Stampin' Up! demonstrator but I can not help using other stamping/crafting products for my cards!  There are WAY TOO MANY great products!
This fun card is a CASE from fellow demonstrator France Martin @ www.frenchiestamps.com.  The technique used for this beautiful background is called "Sunburst".

I wanted to use this technique for my Any Hero cards that I was sending in my box to Operation Write Home.  If you are unfamiliar with Operation Write Home I have a badge on the left side of my blog for you to click on.  It is a wonderful organization that sends your handmade cards to troops overseas.  The troops are then able to write in your cards and send them back to the states to their loved ones!  Now, an Any Hero card is a card that will go directly to a solider that you write a message in either thanking them for their service or about your life!  How cool is that!  I LOVE giving back to the troops!

Thank you for visiting with me today!

Please visit operationwritehome.org & learn about how you can become involved!

Happy Stampin'!


Nicole♥


Supplies Used:

Stamp Set: "Simply Sketched" (SU! Hostess Set)
Ink- Tuxedo Black (Memento)
Cardstock- Night of Navy, Real Red & Whisper White
Printed Paper- "Stars & Stripes" (Doodlebug)
Heart Embossing Folder (Cuttlebug)
Red Ribbon (SU! Retired)
Oval Die Cuts (Spellbinders)


Saturday, September 21, 2013

Butterfly Window- August Workshop


Another beautiful CASE comes to us from fellow demonstrator Brandy Cox @ brandyscards.com!
I decided to use this design for my August workshop so the ladies could  watercolor & play with fishing line!  Who would of thought the common fishing line could be so exciting!
I find any type of coloring to be very relaxing and a great deal cheaper than therapy!  I love how the Daffodil Delight & Tangerine Tango blend so nicely together on the butterfly!  When you open this card you will find a great surprise, another butterfly inside!


Here is a photo showing you where the fishing line is used.

  And another photo showing you the butterfly inside.


Thank you for visiting with me today!

Happy Stampin'!

Nicole♥


Supplies Used:

Stamp Sets- "Best of Butterflies" & "Sassy Salutations"
Ink- Daffodil Delight & Tangerine Tango
Cardstock- Daffodil Delight & Whisper White
Watercolor Paper
Modern Mosaic Embossing Folder
Aqua Painter
Stazon Black Ink
Circle Die Cuts
Clear Fishing Line

Friday, September 20, 2013

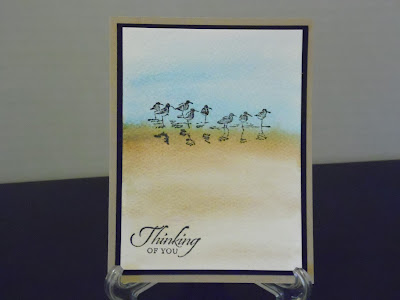
Watercolored Wetlands


I just love learning new techniques!  When I saw this card I thought it would perfect for my Mom & I to make while she was visiting!  This card is a CASE from fellow demonstrator Tami White @ stampwithtami.com.  
The technique used in this card is called a color wash.  To get this excellent background I am using my aqua painter (filled with water of course), reinkers & watercolor paper.  A simple and relaxing card to make that can be turned into a great birthday card, a thank you & so many more!  So, go get out your reinkers and your aqua painter and see what other beautiful backgrounds you can come up with!

Thank you for visiting with me today!

Happy Stampin'!

Nicole♥


Supplies Used:

Stamp sets- "Wetlands"
Ink- Reinkers in Crumb Cake, Soft Suede & Marina Mist
Stazon Black Ink
Cardstock- Crumb Cake & Basic Black
Watercolor Paper
Aqua Painter


Thursday, September 19, 2013

Hello!


I went to Vegas this summer to visit my family and on the day I was leaving  my Mom got to fly home with me!  So while my Mom was visiting us here in Pennsylvania I thought we would try out a few cards I was interested in making.
The card above is a CASE from fellow demonstrator Brandy Cox @ brandyscards.com.  I did not have the exact stamp set she used on her card so I improvised with another.  I kept the colors the same, black & white, it gave the card a classy look.  The stamped border on the left edge of the card was created using a strip of Whisper White card stock & a stamp (from the set I used) inked in basic black to give the appearance of ribbon!  What a crafty idea from Brandy!  My Mom just made this same card when she got home using Tangerine Tango & it looked so beautiful!  I encourage you to make this card with as many colors as possible! An idea would be to turn this card into a "Thank You" needed for any occasion!

Thank you for visiting with me today!

Happy Stampin'!

Nicole♥


Supplies Used:

Stamp sets-  "Lacy & Lovely"
Ink- Basic Black
Cardstock- Basic Black & Whisper White
Large Rhinestones
1 1/4" Scallop Circle Punch
7/8" Scallop Circle Punch
Other size Scallop Punches/Circle (spellbinders)

Wednesday, September 18, 2013

Happy Birthday, Kelsey!


This card was created for my niece Kelsey's birthday!  I wanted to experiment with the new washi tape from Stampin' Up! called "Gingham Garden".  I had to add a little bling to the card by using some glimmer brads for the center of the wheels!  The card came out super cute just like Kelsey!
 

Thank you for visiting with me today!

Happy Stampin'!

Nicole♥


Supplies Used:
Stamp sets- "Moving Forward" (previous catalog) & "Teeny Tiny Wishes"
Ink- Melon Mambo, Island Indigo & Daffodil Delight
Cardstock- Daffodil Delight, Melon Mambo, Island Indigo & Whisper White
Perfect Polka Dot Embossing Folder
Gingham Garden Washi Tape
Glimmer Brads
Circle/Scallop Circle (Spellbinder Dies)
 

Tuesday, September 17, 2013

OWH Birthday Bash Class


I had a great time participating in Operation Write Home's Birthday Bash Class they had on September 12th!  My Mom also signed up for the class & received the same materials (stamp set & ribbon) so this past Saturday we had our class together since we could access it online!  My Mom & I used to get together every Friday night to stamp but then I moved four years ago to Pennsylvania for my husband's work.  So nowadays my Mom & I stamp together from each of our craft spaces (Mom has a cabin in her back yard & I am in a spare bedroom) usually on Friday night thanks to Skype!  A very "BIG" thank you to technology in bringing us "Skype" allowing us to keep in contact family & friends.  My Mom and I will decided on a movie to watch, that we start at the same time, & of course get out our card projects that we are currently working on!

This was my first attempt at blending/shading a stamped image using color pencils.


Thank you for visiting with me today!

Happy Stampin'!

Nicole♥


Supplies Used:

Stamp Set- "Funny Bunny" (My Favorite Things)
Ink- Marina Mist (SU!)  & Tuxedo Black (Memento)
Cardstock- Marina Mist, Soft Suede & Very Vanilla
Ribbon (Bella!)
Color Pencils- (Prismacolor)

Happy Birthday, Andy!


I just love how fun this card is!  I believe this is a CASE from Pinterest & I am sorry to say I do not remember who came up with this design to give them proper credit!  So Sorry!

I sent this card to my Brother-in-law, Andy, for his birthday that was in August!

Thank you for visiting with me today!

Happy Stampin'!

Nicole~


Supplies Used:
 Card stock- Early Espresso, Cherry Cobbler, Island Indigo & Very Vanilla
Stamp sets- "Feeling Sentimental" (from our Sale-a-bration brochure) & "That's the Ticket"
Ink- Early Espresso
Printed Paper- "World Spectacular" (previous catalog)
Versa Mark Pad
Clear Embossing Powder
Chevron Embossing Folder
Ticket Duo Builder Punch
Baker's Twine- Cherry Cobbler

Monday, September 16, 2013

By The Tide- July Workshop


This is the card we made for our July workshop & we all had a blast using the  hair gel technique to create this cool water effect!  Who would of thought!  The card design is a CASE from fellow demonstrator Brandy Cox @ brandyscards.com.

Supplies Used:
Card stock in Whisper White & Night of Navy
"By the Tide" Stamp Set (the "Happy Birthday" is from another set, unfortunately I don't know which)
Ink colors in Night of Navy, Gumball Green, Real Red & Soft Suede
1" Circle Punch
Ovals Die Collection


Thank you for visiting with me today!

Happy Stampin'

Nicole~

Friday, August 30, 2013

Happy Birthday Autumn!


Hello there!
This card was created for my niece, Autumn!  It was her birthday on the 3rd of August and I thought this design would be perfect for her!

I wanted to use some bright and cheerful colors so I decided on Melon Mambo, Bermuda Bay & Whisper White.

I used our stamp set "Moving Forward" that supports the Ronald McDonald House.  I colored the stamped image in Melon Mambo and Bermuda Bay ink, adding some dazzling diamonds glitter to the little flags.  I embossed the Whisper White panel with our "Cloudy Day" embossing folder and then lightly sponged some Bermuda Bay ink in the inside of the clouds.  I stamped the Happy Birthday from our "Curly Cute" stamp set, went over the writing with a clear glitter gel pen & hand cut the Melon Mambo banners.

Thank you for visiting with me today!

Happy Stampin'!

Nicole~

Tuesday, August 27, 2013

Card Submissions


Hello there!

I finally did it!  
I submitted four of my card creations to a well known stamping magazine!  In the last issue there was a sketch challenge that I needed to base my design off of and since the particular magazine I submitted for will be out in winter, I decided to stay with that theme.  I have never submitted anything before so this was a little intimidating with all the fantastic stampers out there!


Please leave me a comment to let me know which one you like the best!

 Above is card #1~ "Merry Christmas" 


Card #2~ "Let it snow"


Card #3~ "Cup of Christmas"


Card #4~ "Pretty Poinsettia"


Thank you for visiting with me today!

Happy Stampin'!

Nicole~


Monday, August 26, 2013

For my Father-in-law


Hello there!
This card was created for my Father-in-law for Father's Day!
My color palette: Old Olive, Early Espresso & Very Vanilla.
I selected the goggles from our "Plane & Simple" stamp set, inked the image in Old Olive, then stamped onto Very Vanilla.  I used our "Labels Framelits" to cut out the image and the Early Espresso piece to attach to the card.  I thought it needed something a little more so I decided on using the piercing templates for the die cuts.  I embossed the Very Vanilla panel with our "Houndstooth" folder and sponged it with Early Espresso ink.  Unfortunately the ribbon I used is retired, so sad!  I just love ribbon!
Thank you for visiting with me today!
Happy Stampin'!
Nicole~

Sunday, August 25, 2013

My Dad- Father's Day


Hello there!
This card was created for my Dad for Father's Day.
My color palette: Marina Mist, Early Espresso & Very Vanilla.
I selected the aircraft from our "Plane & Simple" stamp set, inked the image in Marina Mist, then stamped onto Very Vanilla.  I used our "Labels Framelits" to cut out the image and the Early Espresso piece to attach to the card.  I thought it needed something a little more so I decided on using the piercing templates for the die cuts.  I embossed the Very Vanilla panel with our "Houndstooth" folder and sponged it with Early Espresso ink.  Unfortunately the ribbon I used is retired, so sad!  I just love ribbon!
Thank you for visiting with me today!
Happy Stampin'!
Nicole~

Saturday, August 24, 2013

Faux Giraffe- June Workshop


Hello there!
 
This card was created for our June workshop at my residence.  I know, I am a little behind on my posts!
 
My color palette: Cajun Craze, Early Espresso & Very Vanilla.
 
To create the "faux Giraffe" I used my Versa Mark Pad, some clear embossing powder and a bone folder to make the design in the powder before heat setting with my embossing gun.  I learned this great technique from fellow demonstrator, Dawn Griffith (faux alligator technique).  I stamped the Giraffe in Early Espresso and used my Cajun Craze marker to add color.  I then used my Old Olive marker to color the grass.  I added the "thank you" and three gold brads to complete the look! 
 
Thank you for visiting with me today!
 
Happy Stampin'!
 
Nicole~